Showing posts with label Android. Show all posts

February 01, 2017

How to Pass objects between Activities in Android


January 28, 2017

How to get GCM API & Project ID for OneSignal (FireBase)


July 21, 2016

Introduction to Android Studio Project-Android dev for beginner 01


June 05, 2015

Facebook Lite For Android Direct Download


This Facebook Lite Version is not available in all Countries. So I bought it for You.


Description
This version of Facebook is efficient with data and works in all network conditions.
Facebook Lite:
- Installs quickly — the app is less than 1 MB
- Works on all Android phones
- Uses less data
- Is designed for 2G networks and areas with slow or unstable connections
 Keeping up with friends is faster than ever. Facebook is free and always will be.
About Facebook:
- Message friends and have group conversations
- Get notifications when friends like and comment on your posts
- See what friends are up to
- Share updates and photos
 

Download

June 03, 2015

Create Custom Xperia Themes For Any Xperia Device Both Android 4.2.2 and Android 4.3 and Above


Requirements:


1.   JDK Installed
2.   APK Tool
3.   APK Signer
4.   Rooted Xperia Device ( Only For Android 4.2.2 )
4.1  Smapletheme.apk
5.    Images needed in your theme
6.    Photoshop
7.    Notepad++

Download Links at Bottom of this Post
Watch Below Video For Detailed Explanation

May 10, 2015

Lollipop 5.1K-MOD For Sony Xperia C 2305

 
I am not  responsible if you brick the device. Read instructions carefully before proceeding
 CWM Zip By Me

SystemUI By: John Mark Urrera

ScreenShots:


Instrucions:

1. Your Device Must Be Rooted
2. CWM Recovery Installed
3. Reboot to CWM Recovery 
4. wipe data/factory reset=>yes
5. Wipe cache partition=>yes
6. Advanced=>wipe dalvik cahe=>yes
7.+++++Go Back++++++
8.Install zip From SD Card=> Choose Zip From sdcard=> Select Lollipop_5.0.1_For    Xperia_C2305_Karthik_M.zip from your sd card
9. Then seect Yes - Install Lolliop 5.0.1 For Xperia C2305
10. After seeing Message Install zip from sd Card Complete Reboot your Device
11. After reboot compete your basic setup.
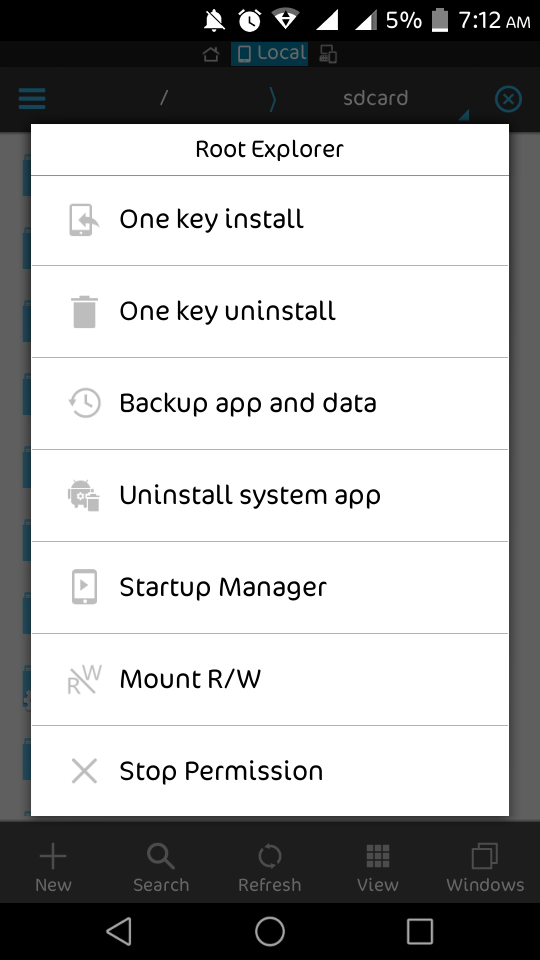
12. Open your apps menu and open ES File Explorer and do as shown in below screenshots


 13. Now close ES File explorer
 14. Reboot your Device to CWM REcovery Again
15.Install zip From SD Card=> Choose Zip From sdcard=> Select Lollipop_5.1_K-MOD_www.karthiktechfreak.blogpot.com.zip  from your sd card
16. Then seect Yes - Install Lolliop 5.0.1 For Xperia C2305
17. After seeing Message Install zip from sd Card Complete Reboot your Device
18. If you see Pure Xperia Is upgrading. Success Yenjoy.

Share My Work If You Enjoy....


  Download Links:
 Lollipop_5.0.1_For    Xperia_C2305_Karthik_M.zip

 Lollipop_5.1_K-MOD_www.karthiktechfreak.blogpot.com.zip


April 15, 2015

Install CWM Recovery in Xperia C With S1 Boot Version 2.14.J.0.68


For the unlucky users running on Boot Version 2.14.J.0.68 like me, we have finally discovered the solution by which we can successfully install CWM on Xperia C . This procedure will guide you to successfully first port to  S1 Boot Version 2.14.J.2.16 and then you can finally Install CWM on Xperia C using Mobile Uncle Tools

For Instructions To Change S1 Boot Version of Xperia C Watch Below Video


After Changing S1 Boot Version From  2.14.J.0.68 to 2.14.J.2.16 Watch Below Video For Installing CWM Recovery Using Mobile Uncle Tools


DOWNLOAD LINKS


April 06, 2015

Sony Material Design Apps Album - Walkman - Movies


To Download App Click On Any Icon:     


 SONY MOVIES


April 05, 2015

[Download Only] Sony Xperia C Android Lollipop 5.0.1


                            This Post Is For Download Only    

  
                                                                                                                               Downloads


                                                  For Screenshots and Instructions Go Here    

                                    For Live Demo Go Here


February 23, 2015

Increase Internal Storage of Xperia C From 0.98GB to 1.98GB


"Note Your Device Must be Rooted and CWM REcovery Install For this MEthod TO work. Do at your own risk.  I am Not Responsible For anything that happens to your Xperia C Device."

  1. Important : First of all Take Full CWM backup of Xperia C, by booting into recovery and selecting Backup and Restore and then selecting backup using power button. This is needed because in the process of Increasing App storage space of Xperia C, your full data will be lost and therefore you need CWM Backup to restore to the point you took the backup. If you do not have CWM Recovery Installed, then read this : Install Pure CWM on Xperia C and then proceed. Any other recovery like Carliv or TWRP can also work.
  2. Now download Increase Apps Storage Space of Xperia C file from the link in 3rd Step, It is flashable zip file. One must place the downloaded zip file to SDcard or any other location you remember.
  3. Download Increase Apps Storage.zip and Copy it to your SD Card
  4. Now boot into recovery and flash the downloaded file using Install ZIP from SD card.
  5. Once installation is finished, then restart your Xperia C.
  6. Xperia C will take almost 10 minutes in rebooting, Please Do not get panic, as we have already tested the same and found it working on Xperia C.
  7. Once Xperia C starts, then simply turn off the phone and again boot into recovery and restore the backup you created earlier using CWM. By this you will restore all the data you had earlier.

Watch below Video, I had explained very detail in this video

                                            PROOF


If you Like My Tutorial please Share it using any of the Social Buttons Below

How to Decompile Edit and Recompile Android Apps in APK Studio 100% Working Method.

Watch below Video, I had explained very detail in this video 


I you Like My Tutorial please Share it using any of the Social Buttons Below

January 19, 2015

OGWhatsApp APK Latest Version Download


Dual WhatsApp


OGWhatsAp


Use two telephone numbers with WhatsApp

Description

Once you install OGWhatsApp on your Android device, the app allows you to use two different telephone numbers with WhatsApp from the same smartphone.


It´s much easier to install OGWhatsApp than it might seem at first. You just have to follow the steps Shown in Below Video


OGWhatsApp is a very useful tool for users who want to have two WhatsApp telephone numbers on their Android device.

December 30, 2014

Convert Any Website into Android Application in Android Studio


PART - II


PART - III


GET MY PROJECT CODE HERE


                                       GET MY ANDROID APK FILE HERE


August 02, 2014

How To Use 2 Numbers of WhatsApp In One Device


Now You Can Use two whatsApp Numbers in one Device

Requirements:
- Android Mobile 2.3+
- File Explorer { Es File Explorer Recommended }
- OGWhatsApp
- Official WhatsApp
- Little Brain


Procedure:
- First Backup your messages from existing  WhatsApp Account (In case you want the messages)
- Uninstall your WhatsApp From your Device
- Open your File Explorer see for 'WhatsApp' Folder and Rename it to 'OGWhatsApp'
- DownLoad and install OGWhatsApp Form HERE
- Launch OGWhatsApp and Login with Your Existing WhatsApp Number
- Next Install Official WhatsApp From Play Store And Login With Your Second Number
- Hope you understood.
- Share This Trick With your Friends And Enjoy 

April 14, 2014

[ How To ] Hacking And Bypassing Android Password / Pattern / Face / PI


Credits: This Article Credit goes to XDA Developers http://forum.xda-developers.com
              I am just posting this here for you
This Is For Educational Purposes Only
You Shall Not Use This On Other People Phones Without Permission Under Any Circumstances
I'm Not Responsible For Any Eventual Errors And Misbehaving Of Your Devices
Files And Tutorials Are Used And Partially Created According My Expirience And Also Collected From Internet & XDA Forums
All Regards Are Going To Their Authors


Requirements:
The Device Needs To Have Usb Debugging Enabled
In Case Usb Debugging Isn't Enabled And You Have Recovery,you Can Run The Same Instructions From Recovery
For Some Methods Root Is Not Required (Though It Will Be Better If Device Is Rooted)


If None Of This Methods Works For You - Unfortunally You Probably Must Full Wipe Your Device
METHOD I

Solution For Everyone With Recovery (Cwm, Twrp, Xrec,Etc...) Installed:

INSTRUCTIONS:

1. Download this zip Pattern Password Disable (Download from attachments) on to your sdcard (using your PC, as you cant get into your phone, right )
2. Insert the sdcard into your phone
3. Reboot into recovery mode
4. Flash the zip
5. Reboot
6. Done!

Note : If You See The Gesture Pattern Grid Or Password After Restarting, Don't Worry. Just Try Any Random Pattern Or Password And it Should Unlock.


METHOD 2
Solution For Everyone Without Recovery Installed - ADB :

What You Need:
=>A computer running a Linux distro or Windows+Cygwin
=>USB cable to connect your phone to the PC
=>Adb installed

How to install adb:
1. Open Terminal
2. Type:
Code:
sudo apt-get install android-tools-adb
Hit [Enter]
3. Follow the instructions until everything is installed.

INSTRUCTIONS:
1. Connect you (turned on) Phone to the Computer via USB.
2. Open a terminal window.
3. Type:
Code:
adb devices
adb shell
cd data/system
su
rm *.key
4. Done...Now You Just Have To Reboot.

Note : If You See The Gesture Pattern Grid Or Password After Restarting, Don't Worry. Just Try Any Random Pattern Or Password And it Should Unlock.


METHOD 3
Solution For Everyone Before Lock Accident :

SMS Bypass - Download Link - Install It On Your Device (Download from attachments)
This App Allows You To Remotely Bypass Your Phone's Screen Lock By Sending A SMS.
It Removes Your Gesture Pattern Or Password After Receiving A Preset Keyword Along With A Secret Code Via SMS.
SMS Bypass App Requires Root.


INSTRUCTIONS:
1.First, make sure you give permanent root access to the app.
2.Change the secret code to your preferred choice. The default password is : 1234
3.To reset your screen lock, send the following message from another phone:
Code:
secret_code reset
Example:
Code:
1234 reset
Note 1 : There is a space between your secret code and reset. Also the secret code is case sensitive.
Note 2 : There is an option available to change the preset keyword. Default is : reset - Your phone will restart and your lock screen will be reset.
Note 3 : If You See The Gesture Pattern Grid Or Password After Restarting, Don't Worry. Just Try Any Random Pattern Or Password And it Should Unlock.


METHOD 4
Solution For Everyone Via Adb - SQL Command :

INSTRUCTIONS:
=>Type This Commands Separated In Your Terminal (CMD Prompt) :
Code:
adb shell
cd /data/data/com.android.providers.settings/databases
sqlite3 settings.db
update system set value=0 where name='lock_pattern_autolock';
update system set value=0 where name='lockscreen.lockedoutpermanently';
.quit
=>Now You Just Have To Reboot.

Note : If You See The Gesture Pattern Grid Or Password After Restarting, Don't Worry. Just Try Any Random Pattern Or Password And it Should Unlock.


METHOD 5
Solution For Everyone Via Adb - File Removal :

INSTRUCTIONS:
=>Type This Command In Your Terminal (CMD Prompt) :
Code:
adb shell rm /data/system/gesture.key
Note : If You See The Gesture Pattern Grid Or Password After Restarting, Don't Worry. Just Try Any Random Pattern Or Password And it Should Unlock.


METHOD 6
Solution For Everyone With USB Debugging Enabled :

INSTRUCTIONS:

Primary Step for all method:
  1. Download & Extract to anywhere - Bypass Security Hack (Download from attachments)
  2. Open SQLite Database Browser 2.0.exe in SQLite Database Browser.
  3. Run pull settings.db.cmd inside By-pass security Hacks folder to pull out the setting file out of your phone.
  4. Drag settings.db and drop to SQLite Database Browser 2.0.exe program.
  5. Navigate to Browse data tab, At table there, click to list down the selection & selete secure

Instruction To Remove Pattern Lock:
  1. Now, find lock_pattern_autolock, Delete Record
  2. Close & save database
  3. Run push settings.db.cmd and reboot your phone

Instruction To Remove PIN Lock:
  1. Now, Find Or Create lockscreen.password_type, double-click & change it's value to 65536, Apply changes!
  2. Now, find lock_pattern_autolock, Delete Record, If doesn't exist, Ignore
  3. Close & save database
  4. Run push settings.db.cmd and reboot your phone

Instruction To Remove Password Lock:
  1. Now, find lockscreen.password_salt, Delete Record
  2. Now, find lockscreen.password_type, Delete Record
  3. Close & save database
  4. Run push settings.db.cmd and reboot your phone

Note : If You See The Gesture Pattern Grid Or Password After Restarting, Don't Worry. Just Try Any Random Pattern Or Password And it Should Unlock.


METHOD 7
Solution For Everyone With Recovery Installed :

INSTRUCTIONS:

1.Download and Copy Aroma File manager.zip (Download from attachments) to your memory card.

2. Open your recovery (press volume Down + Power button or it can be different according to the phones. Generally the phones who have press able button on the middle they have to press all three buttons. Google for you pattern there are lots)

3. There’ll b an option in recovery called “mount”. Go in that option and then mount all the cache and everything it is there.

4. Then select “update” and select “apply update from SD/external” and select aroma file manger.zip file that you downloaded using above QR code above.

5. After Flashing or updating, the aroma file manger will open. Use volume keys for up/down and power button 2 select like you use to get into recovery.

6. In aroma File manager , Go to menu , which is located in bottom strip and then select Settings.

7. Go to bottom n select “mount all partition in startup ” then exit from aroma file manger.

8. Now after exit , re-update that aroma file again and it will open again.

9. Go to data >> and then System.
Then find ‘gesture.key’ (for pattern lock) and ’password.key’ (for password lock) then long touch on gesture.key or password.key and sum option will be prompted , choose delete and delete that file and restart.

Note : If You See The Gesture Pattern Grid Or Password After Restarting, Don't Worry. Just Try Any Random Pattern Or Password And it Should Unlock.

ATTACHMENTS

Pattern-Password-disable.zip   

SMSBypass.apk 

By-pass security Hacks.7z

aromafilemanager.zip 

February 13, 2014

Sony Xperia Sirius D6503


Sony’s upcoming D6503 Sirius Android flagship appeared yet again before its official announcement. This time around, the handset was shown off in a brief video.
The two-minute long video clip showcases Android 4.4 KitKat on the device, dressed in Sony’s latest UI. See it below.


                                         Sony Xperia Sirius D6503 

Sony is expected to officially take the wraps off the D6503 Sirius at the end of this month during MWC in Barcelona. We will be there live, so hands-on and first impressions from the device are certainly in order.

January 14, 2014

Moto G to be a first non-Nexus phone to run on 4.4.2 KitKat


Google in association with Motorola today confirmed the news about Moto G to be a first non-Nexus phone to run on 4.4.2 KitKat (latest version).  Rumors surrounding this were commonplace a few months back but today it has been officially declared by Google.


No other smartphone in the market other than Google’s very own Nexus series boasts of the new faster and more clever Android 4.4.2 KitKat. Moto G users can start updating their device to the latest 4.4.2 KitKat this week onwards. KitKat is hailed as the best Android version to ever come out of Google’s stable. The powerful and smarter KitKat enables better SMS and chat messages integration in Hangouts, seamless Google Now compatibility and takes wireless printing to a whole another level. The voice recognition feature of KitKat has also been over hauled and functions brilliantly. Apart from all of this, there are many other features loaded in the 4.4.2 KitKat for Moto G users to get excited about.